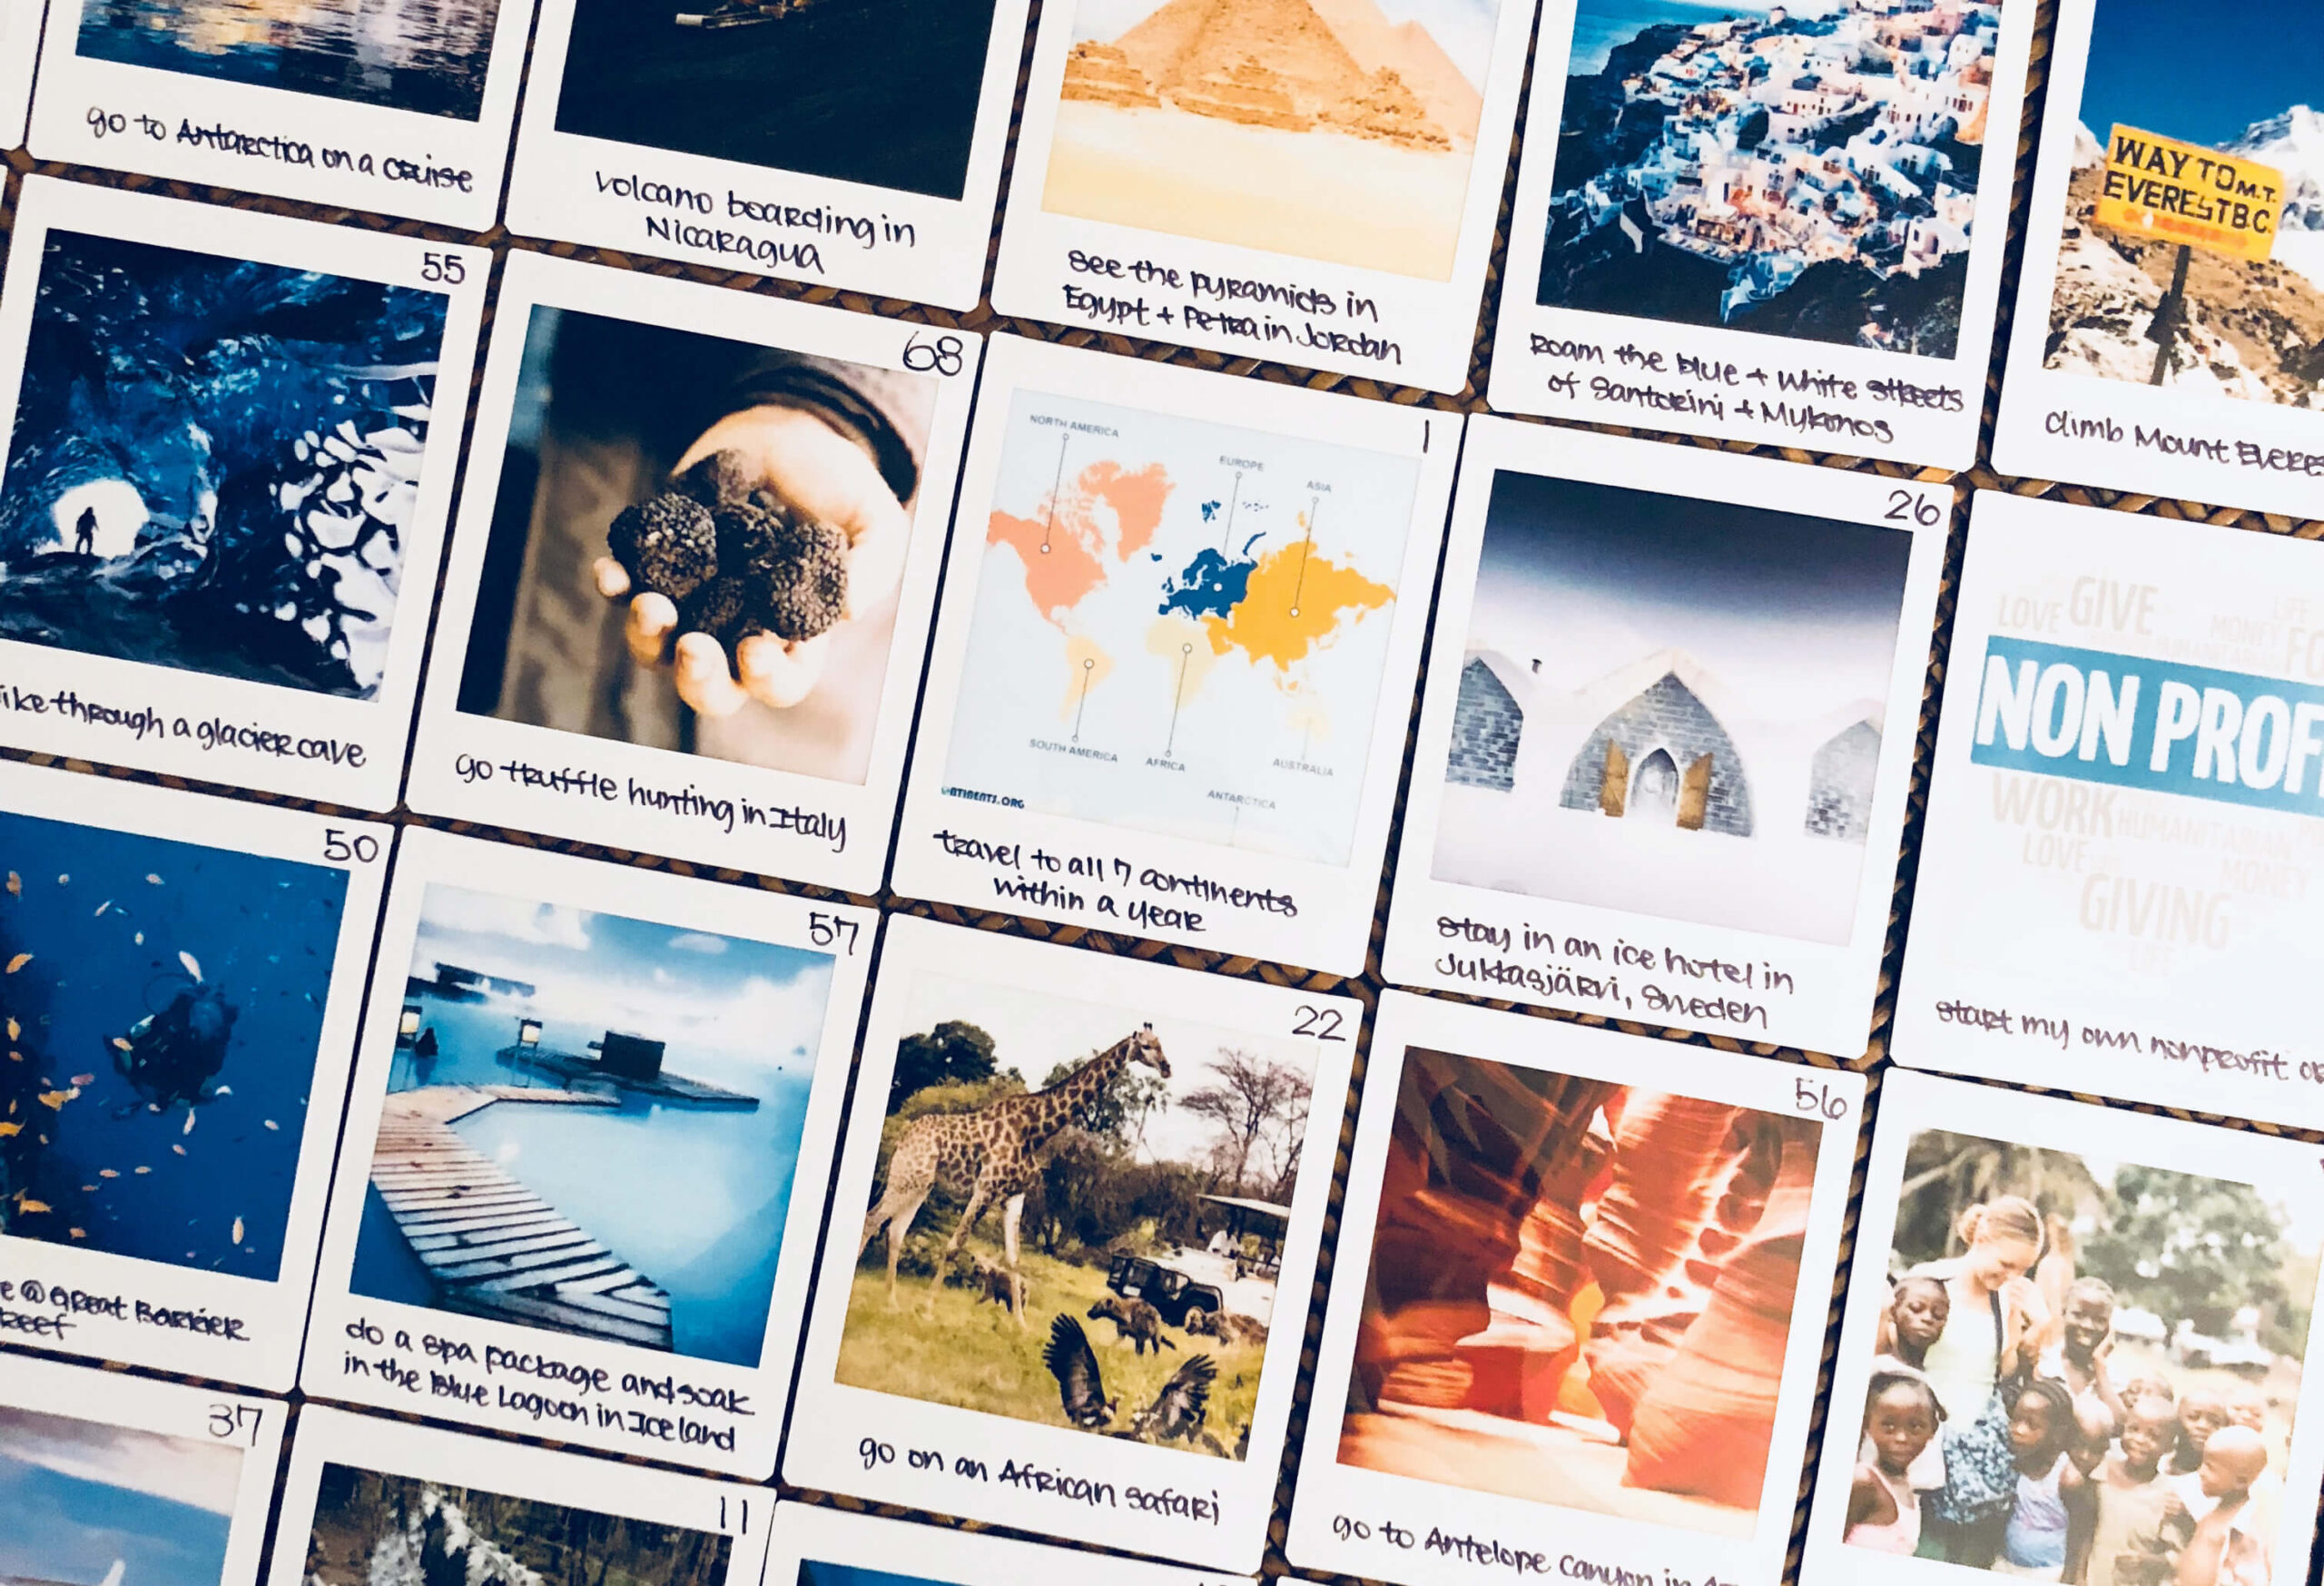
Let’s take vision boarding to a new level
No more collaging them by cutting out of magazines or printouts. No more creating pins digitally and not being able to access them offscreen and view them regularly in your physical space.
I have an alternative method to show you, and it’s just as fun to create. If not, easier.
This vision board can grow and evolve with you.
You can still choose whatever image you like to evoke and inspire your desires.
It even gives you the option to label or elaborate on your desire.
It doesn’t require any scissors, glue, or tape, and still has a creative element to it.
You won’t feel the need to hide it because it’ll look like a display piece in your space.
Before we get started
Do you have your outrageous desires list created already? If you don't know what I'm referring to yet, check out this post first: Screw bucket lists. Do this instead…
If you do, awesome. So now what?
Make them come alive… off paper
I didn’t want my list of desires to just die there in my journal, nor stuffed away on a shelf or drawer somewhere to never be seen again. I tried converting it to a digital file, thinking that’ll help me review it more often. Nope, but it did make it easier to access from any device. Additionally, it felt a little lackluster as they were just words on a page. It also felt filed away like any other digital file on my computer without much significance to it.
This is my outrageous desires list! Remember, I wanted this list to make me come ALIVE and inspire me.
When I first started my outrageous desires list, I have already heard about the hype and benefits of doing vision boards. I’ve even done one of those cutout collages when I had a stack of old magazines I could cut out. But it was still such a hit or miss of finding the right images that I wanted. I also didn’t want to go out and buy magazines to cut out. It felt like cutting up money as magazines have gotten quite pricey, too.
Printing my own images felt like a good alternative, but what if I already completed them? I wanted my vision board to continually represent what my growing vision looks like without needing to redo the whole thing each time.
Pinterest seemed like a good solution, but the same issues occurred as the Google Docs, I barely reviewed them as they were out of sight and out of mind.
My vision board needed to be a physical piece in my space, so I can actually see it often to be inspired by it.
C’mon, I was a designer, too! I wanted to do mine slightly differently and more creatively than what I’ve seen others do as well.
Creative problem-solving to the rescue
TADA!!! Here's the solution I came up with:
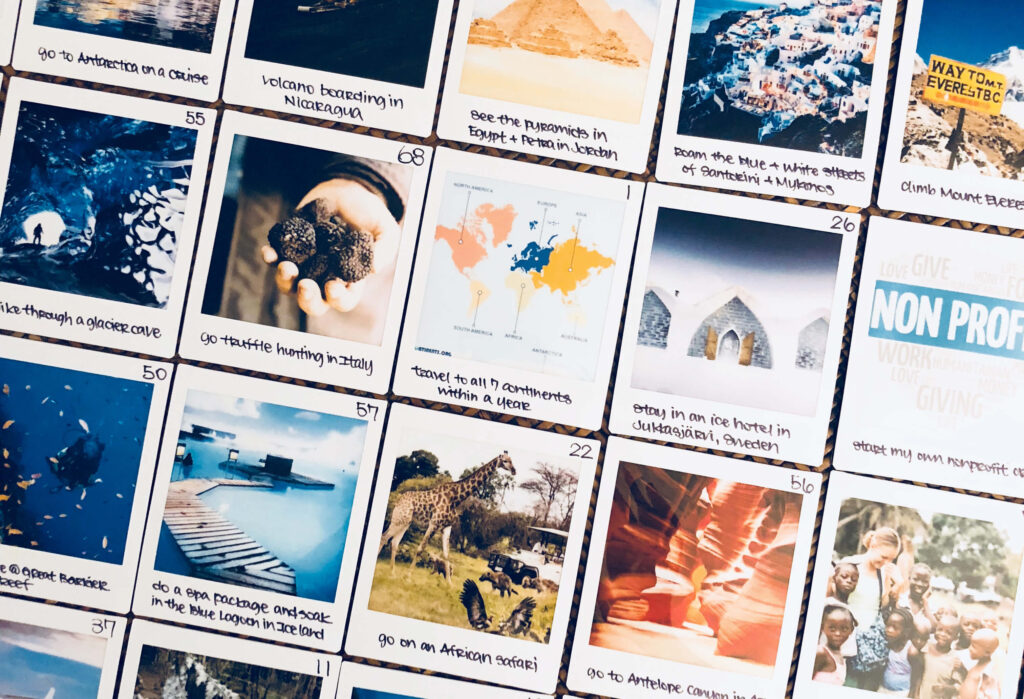
This living vision board can be updated when your desires are complete or when you’ve outgrown them. You can also change it up based on your latest focus. The overall vision board could be as small or large as you’d like. You can put these up anywhere or even carry them with you in a tiny album if you choose. I have the whole internet to select images from. Plus, I could even add a little blurb to it to strengthen my connection and clarify my desire.
Since I numbered my outrageous desires list, I also included the corresponding number in the top right corner.
Introducing… your living vision board supply list
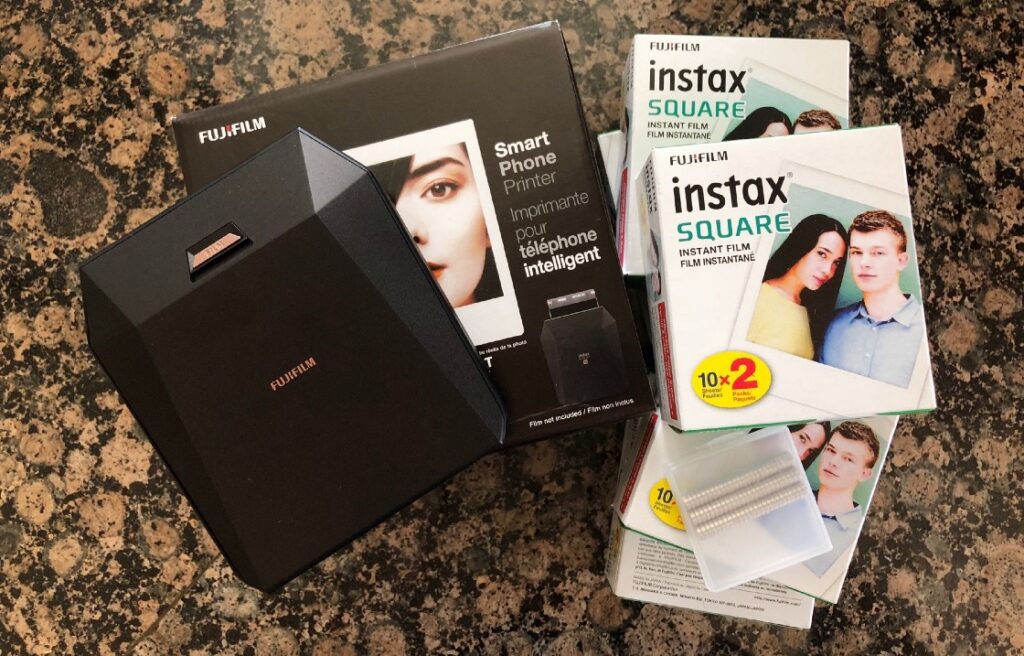
» FUJIFILM INSTAX PRINTER
I recommend (and personally prefer) the square format. The Instax films are slightly smaller than an actual Polaroid. I like the square format since it gave me more visual space for the photo, and the Polaroid-like format meant I had white space to write my actual desires on it. At the time I created this, the wide version didn't have a printer yet. Regardless, they feel too big for my needs, and wider meant fewer desires could be displayed on the board of my choice.
I also prefer the printer versus the camera itself since you can google any image you want, edit/crop it to your liking, and print it out through its companion app on your phone.
Unfortunately, the printer I have is no longer available, but here are the latest models you can consider (and feel free to check out other brands as well):
- Small portrait format (the original Instax size): Fujifilm Instax Mini Link Smartphone Printer
- Wide landscape format: Fujifilm Instax Link Wide Printer
» FUJIFILM INSTAX FILM
Each box comes with 10. I recommend buying extras as you will screw up some prints. Some might not turn out well after exposure or you could’ve found a better image later on during your search. It’s worth reprinting to make sure it looks great and it’ll stir up a deeper desire within you. There are also multiple pack bundles, different colors, and decorated borders to choose from, too.
Obviously, make sure you buy the corresponding film size:
- Small portrait: Fujifilm Instax Mini Instant Film – Twin Pack (20 exposures)
- Wide landscape: Fujifilm Instax Wide Instant Film – Twin Pack (20 exposures)
WARNING: This will fade over time, especially if it's placed under direct sunlight. So please keep that in mind as to where you store and display these. I learned my lesson from finding perfect little circles left behind when I moved the magnets.
» BLACK ULTRA FINE TIP SHARPIES
I found that this works best on the Instax films as it won’t smear easily, it’ll show up clearly, and it shouldn’t fade over time. The ultra fine tip allows you to write smaller. Fine point or chiseled could turn your writing into a blobby mess, especially as the tip becomes rounder. You could also use colored ones, if you choose.
- Sharpie permanent markers: Ultra Fine Point, Black – 2 count
» METALLIC BOARD + SMALL POWERFUL MAGNETS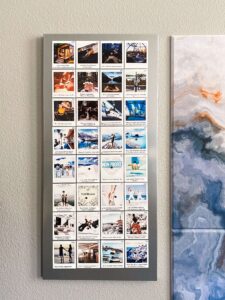
Determine what and how you’d like to display your living vision board. I opted for a metallic board with small powerful magnets. No tape or glue to leave any residue, and no pin marks to ruin the Instax either. I could mount the metallic board on any surface easily with the 3M command strips as well.
Select what size and color board you want, and decide where you want it placed on the wall. I decided on this 30×14″ metallic board since it fit my space the best, along with maximizing how many I could place on one aesthetically well.
- Metallic board: Large magnetic mountable board, 30 x 14 x 0.7″, Steel, 2 Magnetic Dry Erase Pads Included
- Alternative decorative board: Umbra Trigon Magnetic Bulletin Board, 20.87 x 14.96 x 0.63 (I have this one as well in a secondary location.)
- Tiny magnets: Tiny Strong Cylinder Magnets, 5x3mm – 30 pcs
- 3M Command picture hooks and strips: Large Universal Frame Hanger – 3 hangers, 6 strips
» [Optional] BOX TO STORE COMPLETED DESIRES
I got a shadow box with a top slit big enough to easily drop the square Instax into the box. It has little latches on the back like a normal frame, so I could remove the entire shadow box backing if needed.
On the back of each completed Instax, I attached a label stating when it was completed or any other relevant memorable details. Thought it would be a nice touch to review these at the end of the year and celebrate my glorious achievements.
- Shadow box display case: Black Wooden Shadow Box Frame
» [Optional] INSTAX PHOTO ALBUM
When I was traveling a lot more, I used to bring some of my desires as visual reminders with me. This album made it easy to carry and keep them in pristine condition, too. Be sure to purchase the one that fits your Instax film size.
My experience
My first experience took one night to complete. After busily working away like an elf readying for Christmas, I proudly mounted the vertical metallic boards to my wall the next morning. I loved how they looked as I beamed with pride and excitement.
Part of me had a little fear of judgment from friends or family if they saw my vision board when they visited. But I quickly shook off those thoughts and said to myself, “Screw it, who cares what they think?! This is for me! Maybe if they saw what was on my board, they’d get inspired to do their own or want to join me on my adventures.” And that is exactly what happened—several friends jumped on board and wanted to do their own living vision board after seeing mine.
So here I am, sharing this process with you, too.
Nearly 3 years later, I’m still getting more interest each time I show or share my living vision board. For example, I brought these along for my photo shoot. My makeup artist and stylist on site were both so intrigued with this process. It was perfect timing as I was revising and updating this very post to share. (I love these synchronicities when they show up!)
End Results
I had so much fun making these. And more importantly, they continuously inspire me. My first outrageous desire came off my board a couple of weeks later. More came off my board in the following months. It felt amazing each time I took one down and dropped it in my “completed” box frame.
It has been exciting dreaming up more to replace the ones I took down. Honestly, at times, I was even taking them down faster than I can come up with new ones.
Updating this post 3 years later in June 2022, I have a stockpile of desires in a box that isn't on display full time. I intentionally update my board when my goals change and what I want to be inspired by each time I look at them. Some desires are much further out in the future, and some are quicker wins as I continue to replace them with new ones. I have also kindly let go of some desires Marie Kondo-style (with gratitude) as my interests shift and I grow as a person, too. So don't be scared to remove the ones that don't resonate anymore.
There are endless options you can play with to make it fully yours. Use what I've shared here as a launching pad. Do whatever feels right to you. Make your vision board truly yours, down to the tiniest preferences you have.
![]()
YOUR TURN!!
Turn your desires into a vision board of whatever format that resonates for you. Start noticing how it makes you feel seeing your desires, and how quickly they start coming off your board, too.
Cheers, and happy vision boarding!

Psst, all the photos on this post are by the author.
